Introduction
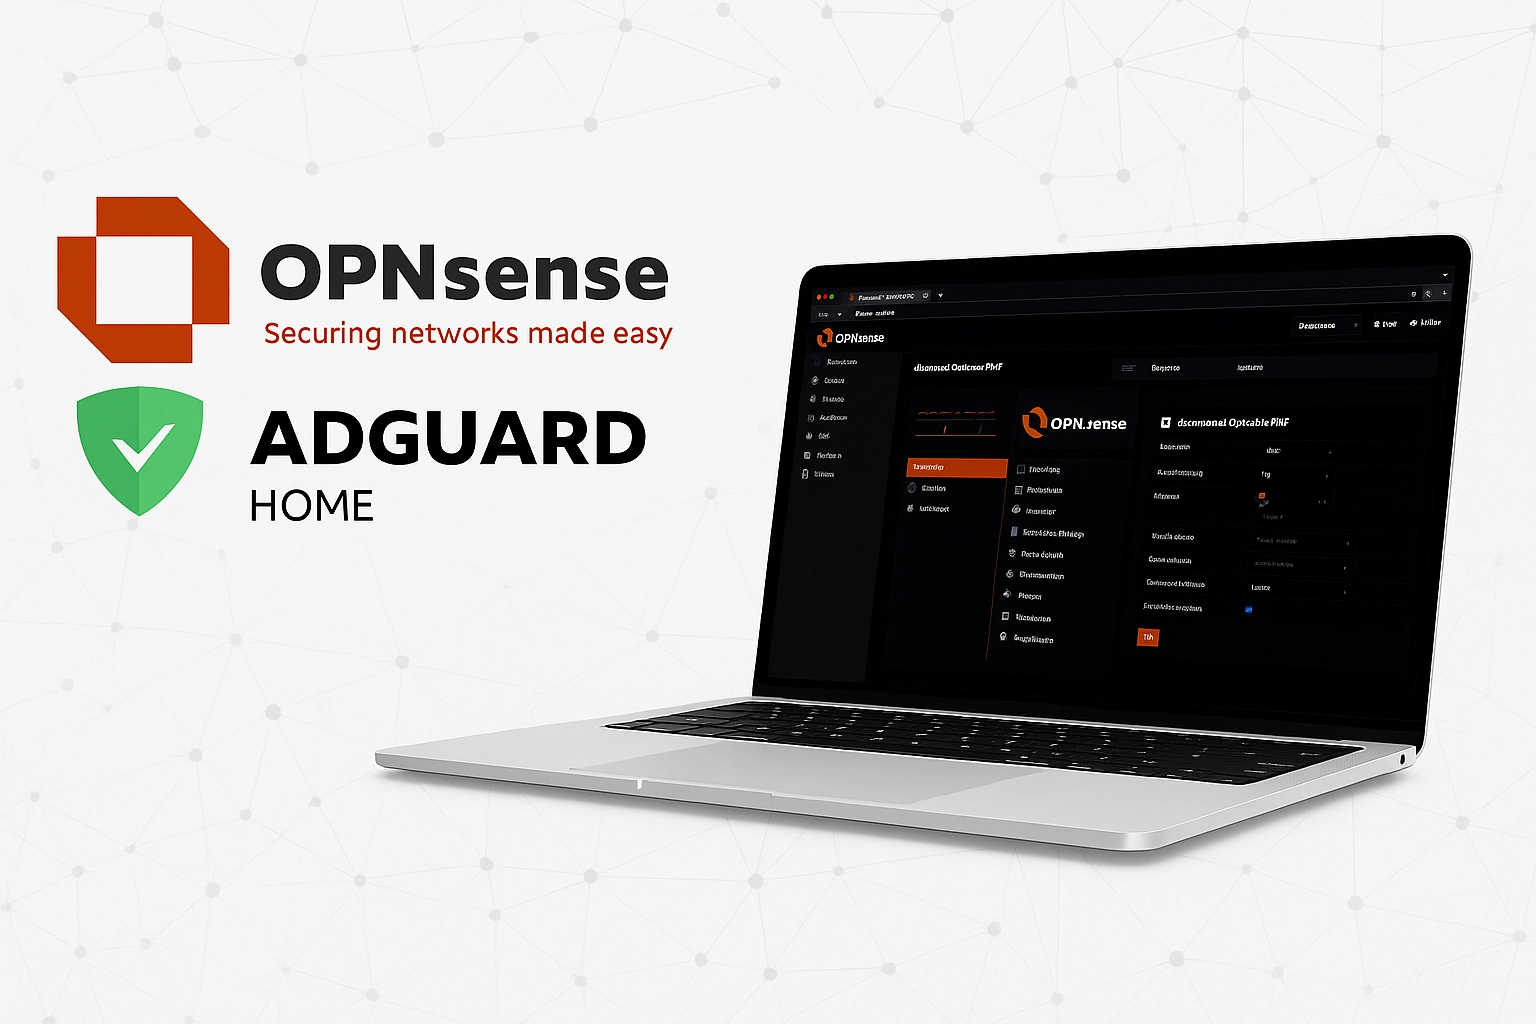
This “How to Set Up DNSCrypt and AdGuard Home on OPNsense” guide walks you through building a secure, filterable DNS stack using only OPNsense plugins – no external devices or client configuration required.
As of OPNsense 25.7 “Visionary Viper”, Dnsmasq has become the default DHCP server, replacing the older ISC DHCP, which will be deprecated. This guide uses Dnsmasq for both DHCP and local DNS resolution of LAN hostnames.
However, you’re free to use any DHCP service (Dnsmasq, Kea DHCP, ISC DHCP, or even AdGuard Home’s built-in DHCP) that fits your network’s needs. The core setup remains the same regardless of your DHCP choice.
In this setup:
- AdGuard Home listens on the LAN interface (port 53) and acts as your local DNS resolver and filter.
- dnscrypt-proxy listens on localhost (port 5353) and forwards encrypted DNS-over-HTTPS (DoH) queries to Quad9’s filtered DNS resolvers, with optional IPv6 support.
- Dnsmasq listens on localhost (port 1053), and handles DHCP, and local
.lanhostname resolution, forwarding upstream request to AdGuard Home. - All LAN clients use AdGuard Home (port 53) as DNS via DHCP, and AdGuard Home uses dnscrypt-proxy and Dnsmasq as upstream resolvers.
- OPNsense itself is configured to use AdGuard Home (10.0.0.1) for DNS resolution.
- A NAT port forward rule transparently redirects all unencrypted DNS traffic (port 53 TCP/UDP) from LAN devices to AdGuard Home at 10.0.0.1, ensuring rogue IoT devices cannot bypass DNS filtering.
The result is a privacy-focused, ad-filtering, encrypted DNS chain, fully managed on the OPNsense firewall. It protects outbound DNS from eavesdropping, blocks trackers and malware domains at the network level, and does not require installing apps or changing settings on individual clients.
DNS Flow Diagram
[LAN Clients]
     |
     v
[AdGuard Home] (10.0.0.1:53)
     |
     +--> [dnscrypt-proxy] (127.0.0.1:5353) --> [Quad9 DoH]
     |
     +--> [Dnsmasq] (127.0.0.1:1053) --> [.lan hostnames]
Requirements
This “How to Set Up DNSCrypt and AdGuard Home on OPNsense” guide assumes you already have an OPNsense router up and running with both WAN and LAN connectivity. In this guide, I’ll be using 10.0.0.1 as the router IP. If your setup uses a different IP (like 192.168.1.1), adjust accordingly. We’ll install both DNSCrypt and AdGuard Home as OPNsense plugins to simplify configuration and management.
1. Configure Dnsmasq
I will be using Dnsmasq as DHCP and DNS for .lan hostnames. If you are using another DHCP server like ISC DHCP or Kea DHCP, you can skip this part. However, if you are using Dnsmasq alerady, make sure to change it’s port according to this guide, as AdGuard Home will be our main local resolver on port 53, using Dnsmasq upstream.
If you have Unbound DNS or any other DNS resolvers installed, make sure to disable them.
1.1 Set DNS Port
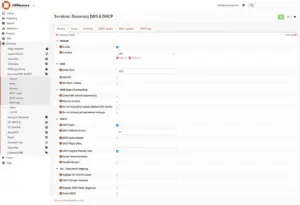
Go to Services > Dnsmasq DNS & DHCP > General
- Enable: Check
- Listen Port: 1053
Click “Apply“.
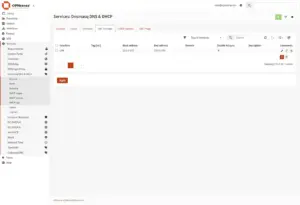
1.2 Set DHCP range
Now go to the “DHCP ranges” tab and click “+ Add“.
Set your desired DHCP range:
- Interface: LAN
- Start address: 10.0.0.100
- End address: 10.0.0.199
Click “Save” and “Apply“.
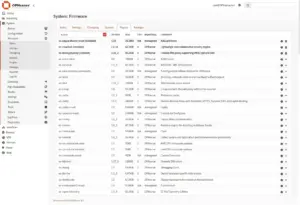
2. Install dnscrypt-proxy and AdGuard Home Plugins
To install dnscrypt-proxy and AdGuard Home as plugins in OPNsense, you’ll have to add mimugmail’s third party OPNsense community repository to FreeBSD.
Log into SSH and type:
fetch -o /usr/local/etc/pkg/repos/mimugmail.conf https://www.routerperformance.net/mimugmail.confIn OPNsense web interface, go to System > Firmware > Plugins, and install os-dnscrypt-proxy and os-adguardhome-maxit.
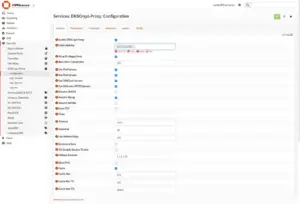
3. Configure dnscrypt-proxy
This section details the configuration of dnscrypt-proxy, including setting general options and adding trusted DNS-over-HTTPS servers.
3.1 General
Go to Services > DNSCrypt-Proxy > Configuration > General
- Enable DNSCrypt-Proxy: Check
- Listen Address: 127.0.0.1:5353
- Use IPv6 Server: Check if your ISP provides you with a IPv6
- Fallback Resolver: 1.1.1.1:53 (We will use Cloudflare as fallback and Quad9 as main resolver)
3.2 Servers
Now go to the “Servers” tab
Here we will add Quad9 DoH filter DNS servers for both IPv4 and IPv6 (only add if supported by your ISP)
The SDNS can be found on DNScrypts GitHub repo.
Add the following:
Name: quad9-doh-ip4-port443-filter-pri (9.9.9.9)
SDNS Stamp: AgMAAAAAAAAABzkuOS45LjkgsBkgdEu7dsmrBT4B4Ht-BQ5HPSD3n3vqQ1-v5DydJC8SZG5zOS5xdWFkOS5uZXQ6NDQzCi9kbnMtcXVlcnk

Name: quad9-doh-ip4-port443-filter-pri (149.112.112.9)
SDNS Stamp: AgMAAAAAAAAADTE0OS4xMTIuMTEyLjkgsBkgdEu7dsmrBT4B4Ht-BQ5HPSD3n3vqQ1-v5DydJC8SZG5zOS5xdWFkOS5uZXQ6NDQzCi9kbnMtcXVlcnk

Name: quad9-doh-ip6-port443-filter-pri (2620:fe::fe)
SDNS Stamp: AgMAAAAAAAAADVsyNjIwOmZlOjpmZV0gsBkgdEu7dsmrBT4B4Ht-BQ5HPSD3n3vqQ1-v5DydJC8RZG5zLnF1YWQ5Lm5ldDo0NDMKL2Rucy1xdWVyeQ

Name: quad9-doh-ip6-port443-filter-pri (2620:fe::9)
SDNS Stamp: AgMAAAAAAAAADFsyNjIwOmZlOjo5XSCwGSB0S7t2yasFPgHge34FDkc9IPefe-pDX6_kPJ0kLxFkbnMucXVhZDkubmV0OjQ0MwovZG5zLXF1ZXJ5

Name: quad9-doh-ip6-port443-filter-pri (2620:fe::fe:9)
SDNS Stamp: AgMAAAAAAAAAD1syNjIwOmZlOjpmZTo5XSCwGSB0S7t2yasFPgHge34FDkc9IPefe-pDX6_kPJ0kLxJkbnM5LnF1YWQ5Lm5ldDo0NDMKL2Rucy1xdWVyeQ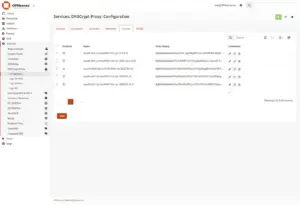
Click “Save“.
3.3 Server List
Now that our custom servers are added, we need to tell dnscrypt to use them.
Go back to the “General” tab, and add the newly added servers to “Server List“:
quad9-doh-ip4-port443-filter-pri (9.9.9.9), quad9-doh-ip4-port443-filter-pri (149.112.112.9), quad9-doh-ip6-port443-filter-pri (2620:fe::fe), quad9-doh-ip6-port443-filter-pri (2620:fe::9), quad9-doh-ip6-port443-filter-pri (2620:fe::fe:9)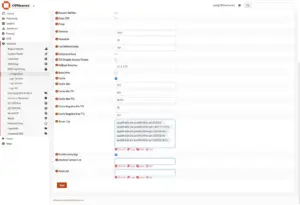
Click “Save“.
4. Enable AdGuard Home
Go to Services > AdGuardhome > General
Check:
- Enable
- Primary DNS
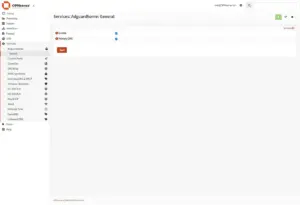
Click “Save“.
5. AdGuard Home Installation
This section walks you through the initial setup and configuration steps to get AdGuard Home up and running within OPNsense.
Step 1/5
Access your OPNsense IP on port 3000
E.g. http://10.0.0.1:3000
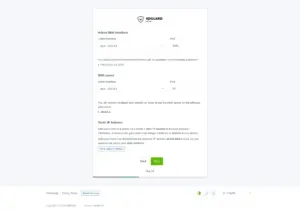
Step 2/5
Admin Web Interface
Listen interface: igc1 – 10.0.0.1
Port: 3000
DNS Server
Listen interface: igc1 – 10.0.0.1
Port: 53
Ignore Static IP Address, as AdGuard Home is running as a plugin inside OPNsense.
Step 3/5
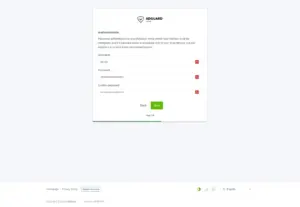
Set desired username and password and click “Next“.
Step 4/5
Click “Next“.
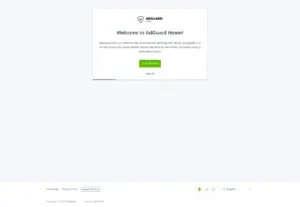
5/5
Click “Open Dashboad“.
6. Configure AdGuard Home
This section guides you through configuring AdGuard Home’s settings to enable encryption, specify upstream DNS servers, and set up local hostname resolution.
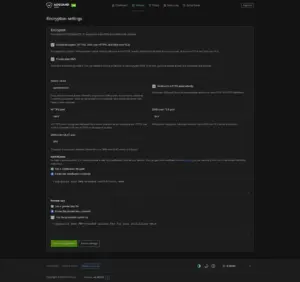
6.1 Encryption Settings
Go to Settings > Encryption Settings
- Check “Encryption (HTTPS/QUIC/TLS support for both DNS and admin web interface“
- Server name: opnsense.lan
- Check “Redirect to HTTPS automatically“
- HTTPS port: 3443
6.2 Create Self Signed Certificate
Now we will create a self signed certificate, since we don’t want to expose OPNsense and AdGuard Home to WAN, and therefor can’t use Let’s Encrypt.
Create a certificate config with your desired hostnames:
cat > opnsense-openssl.cnf <<EOF
[req]
distinguished_name = req_distinguished_name
x509_extensions = v3_req
prompt = no

[req_distinguished_name]
CN = opnsense.lan

[v3_req]
subjectAltName = @alt_names

[alt_names]
DNS.1 = opnsense.lan
IP.1 = 10.0.0.1
EOF
Now create the certificate and private key:
openssl req -x509 -nodes -newkey rsa:2048 \
  -keyout opnsense.key \
  -out opnsense.crt \
  -days 36500 \
  -config opnsense-openssl.cnf
Paste the content of opnsense.crt into “Certificates” and opnsense.key into “Private Key“.
AdGuard Home will complain because it’s a self signed certificate. Just click “Save configuration“.
Now you can access AdGuard Home over HTTPS https://10.0.0.1:3443
Note that HTTP on port 3000 will be disabled when “Redirect to HTTPS automatically” is checked.
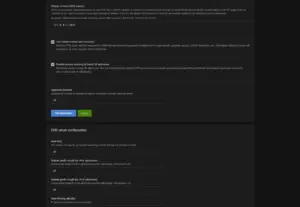
6.3 Upstream DNS servers
Go to Settings > DNS settings
In Upstream DNS servers we need to specify our local dnscrypt-proxy and Dnsmasq servers:
127.0.0.1:5353
[/lan/]127.0.0.1:1053
6.4 Private reverse DNS servers
Scroll further down the AdGuard Home DNS settings page to “Private reverse DNS servers”.
Set the following value:
127.0.0.1:1053Make sure these are checked:
- Use private reverse DNS resolvers
Lets AdGuard ask Dnsmasq for the hostname of local IPs (like10.0.0.1). Without this, reverse lookups won’t work. - Enable reverse resolving of clients’ IP addresses
AdGuard automatically shows device names (likeopnsense.lan) instead of just IPs in the query log.
Click “Apply“.
7. Configure Dnsmasq DHCP DNS
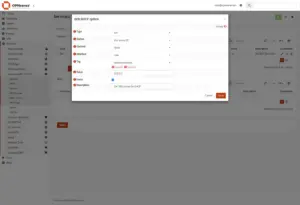
In the OPNsense web interface, go to: Services > Dnsmasq DNS & DHCP > DHCP options
Click “+ Add” and set the following values:
- Option: dns-server [6]
- Interface: LAN
- Value: 10.0.0.1
- Force: Checked
- Description: Set DNS Server for DHCP
Click “Save” and “Apply“.
8. Configure OPNSense DNS Settings
This section covers configuring OPNsense’s DNS settings, including forcing DNS resolution through AdGuard Home and redirecting unencrypted LAN DNS traffic to ensure comprehensive filtering.
8.1 Force OPNSense to use AdGuard Home as DNS
Now, let’s set OPNsense itself to use AdGuard Home as DNS. We will also a set domain (tld actually).
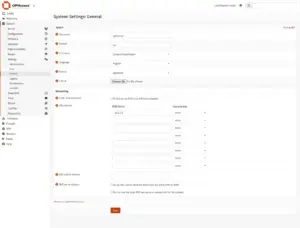
Go to System > Settings > General
- Domain: lan
- Allow DNS server list to be overridden by DHCP/PPP on WAN: unchecked
- Do not use the local DNS service as a nameserver for this system: unchecked
We will set OPNsense to use AdGuard Home:
DNS server:
10.0.0.1Click “Save“.
8.2 Redirect Unencrypted LAN DNS Traffic to AdGuard Home
Some IoT devices use hardcoded DNS servers ignoring your DHCP DNS settings, sending unencrypted queries directly to public DNS servers. This bypasses your AdGuard Home filtering and encryption, exposing DNS queries to eavesdropping and losing protection.
To fix this, we’ll create a NAT port forwarding rule that transparently redirects all DNS traffic (port 53 TCP and UDP) from LAN clients to AdGuard Home on 10.0.0.1 port 53.
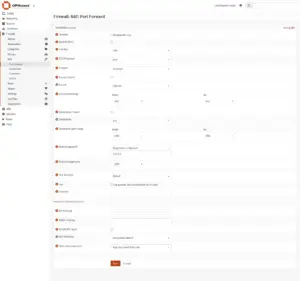
Go to Firewall > NAT > Port Forward and click “+ Add“.
- Interface. LAN
- TCP/IP Version: IPv4
- Protocol: TCP/UDP
- Source: [Advanced] LAN net
- Source port range: any
- Destination: any
- Destination port range: DNS
- Redirect target IP: [Single host or Network ] 10.0.0.1
- Redirect target port: DNS
- Description: Redirect LAN DNS to local resolver
- Filter rule association: Add associated filter rule
Click “Save” and “Apply“.
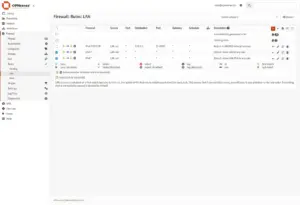
8.3 Prioritize LAN Firewall Rule for DNS Redirect
To ensure all DNS traffic from LAN devices is properly redirected to AdGuard Home, the automatically created firewall rule for DNS redirection must be placed above any general allow rules on the LAN interface. Firewall rules are processed top-down, so prioritizing this rule guarantees DNS queries are matched and redirected before being allowed to bypass the filter.
Go to Firewall > Rules > LAN
- IPv4 *: check
- IPv6 *: check
Now click “<- Move selected rules to the end“. It’s the icon top right corner next to the orange +. This results in our “Redirect LAN DNS to local resolver” rule is moved to the top.
Click “Save” and “Apply“.
8.4 Verify
To verify that your NAT port forward DNS redirect is working and no devices are bypassing AdGuard Home by sending unencrypted DNS queries directly to external servers, monitor DNS traffic on your WAN interface (e.g. igc0) with the following command:
sudo tcpdump -nni igc0 'udp or tcp and port 53'When monitoring DNS traffic on the WAN interface, any DNS queries leaving your network will show your router’s external IP address as the source and the external DNS server’s IP as the destination.
If you see no DNS queries originating from your external IP on port 53, it means no DNS requests are leaking unfiltered from your network.
Note that you might still see incoming DNS queries from other external IPs targeting your WAN IP. These are usually port scans or unsolicited probes and are blocked by OPNsense’s default firewall rules.
9. Done
That’s it. OPNSense, DNSCrypt, Dnsmasq, and AdGuard Home are now installed and properly configured.
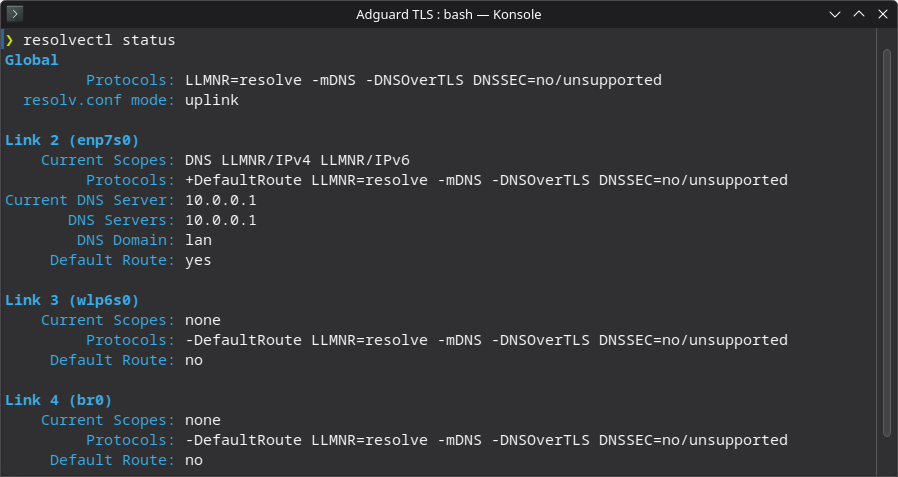
10. Verify DNS Configuration
On your client machine, refresh the LAN connection to apply the updated DHCP lease and DNS settings:
nmcli device disconnect enp7s0
nmcli device connect enp7s0
Verify Current DNS Server is set to “10.0.0.1”, and DNS domain is set to “lan”:
resolvectl statusExpected output:
Now you should be able to access OPNsense on https://opnsense.lan (or https://10.0.0.1) and AdGuard Home on https://opnsense.lan:3443 (or https://10.0.0.1:3443)
From your client, you can verify that you’re using Quad9’s DNS servers by visiting: dnscheck.tools
To confirm that your resolver is using DNS-over-HTTPS (DoH) to reach Quad9, run:
dig +short txt proto.on.quad9.netExpected Output:
doh.This confirms that our DNS traffic is securely routed through Quad9 using DNS-over-HTTPS (DoH) via dnscrypt-proxy, ensuring both privacy and integrity of outbound DNS queries.
Conclusion
You’ve now successfully set up DNSCrypt and AdGuard Home on OPNsense, building a secure and centralized DNS stack where all LAN DNS queries are filtered by AdGuard Home and securely forwarded to Quad9 DoH using dnscrypt-proxy.
Client devices receive the correct DNS server via DHCP, OPNsense uses AdGuard Home with plaintext fallbacks for redundancy, and local hostname resolution is handled by Dnsmasq, allowing internal hostnames like opnsense.lan to resolve correctly across your network.
To ensure rogue IoT devices with hardcoded unencrypted DNS settings cannot bypass filtering, a NAT port forward rule transparently redirects all LAN DNS traffic on port 53 to AdGuard Home at 10.0.0.1.
The result is a privacy-respecting, encrypted, and self-contained DNS setup that requires no client-side configuration and supports local hostname resolution through Dnsmasq and reverse DNS integration in AdGuard Home.
Nordic DNS Blocklist
If you’re located in the Nordics, you can extend AdGuard Home with a targeted blocklist I maintain. It focuses on ad, tracking, and analytics domains commonly seen in Denmark, Sweden, Norway, Finland, and Iceland, with privacy in mind. It’s not a full replacement for general blocklists, but a regional supplement.
Details and usage instructions are available on GitHub: