This guide explains how to configure ntfy notifications for Zabbix using a native media type.
ntfy is an open-source push notification service that supports public topics, Pro plans with authentication, and full self-hosting support.
I wrote a native Zabbix media type specifically for ntfy, using Zabbix’s built-in JavaScript-based media type system (introduced in Zabbix 6.0+).
The integration is fully self-contained and does not require any external scripts or cron jobs.
If you’re looking to set up ntfy notifications for Zabbix without relying on external scripts or cron jobs, this guide walks you through the full setup. Get the script at the bottom of the page.
Features
- Sends notifications to a custom ntfy topic, using public or self-hosted server.
- Supports token or username and password authentication.
- Supports HTTP Proxy.
- Maps Zabbix
{EVENT.SEVERITY}to ntfy priority (1–5). - Adds ntfy emoji tags according to severity.
- Resolved issue notifications start with a green checkmark emoji (✅) for clarity.
- Does not log any data, ensuring that sensitive information such as the token, username, and password is never written to logs.
Severity and priority mappings explained
Screenshot
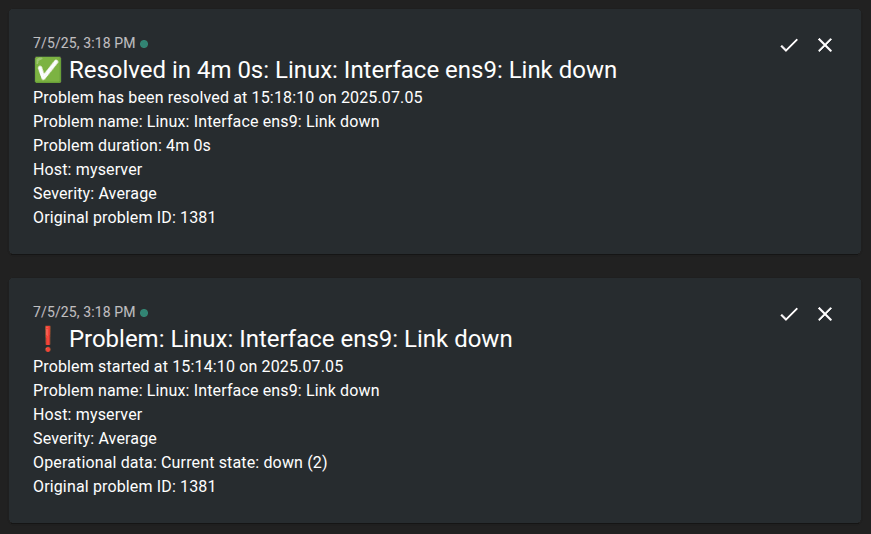
Example of an Average-level notification in ntfy:

Installation
1. Download and install ntfy media type
Download ntfy.yaml and import it in Zabbix: Alerts > Media types > Import.
Choose file, and click Import and Apply.
Configuration
1. Configure Media Type
If you’re using ntfy’s free public server, no changes are needed.
If you’re using a Pro plan or a self-hosted ntfy instance, click on the media type to configure the following fields:
- Token or Username and Password: Used for authentication. Only one method is required.
- URL: Set this if you’re using a self-hosted ntfy server. Otherwise, leave it as is.
- HTTPProxy: If your Zabbix server requires outbound HTTP requests to go through a proxy, enter it here, or leave blank if not needed.
Format:http://proxy.example.com:8080.
2. Enable notifications for user
Go to Users > Users > Username (e.g. Admin) > Media and click Add.
Set the following criteria:
- Type: ntfy
- Send to: Your ntfy topic
Click Add and Update.
3. Configure Conditions for Notifications
Go to Alerts > Actions > Trigger actions > “Report problems to Zabbix administrators” and click Add.
Set the following criteria:
- Type: Trigger severity
- Operator: is greater than or equals
- Severity: Warning (or desired severity level)
Click Add and Update.
Test Media Type
Go to Alerts > Media types > click Test in the ntfy column, and fill out:
- Message: This is a disaster message!
- Severity: Disaster
- Subject: Danger
- To: Your ntfy topic
If using authentication, fill out Token, or Username and Password, then click Test.


